
ARM Templates: Working with nested templates in Azure
Working with nested templates in Azure ARM templates is something that not all are using, and I don´t think everyone knows about it either. Nested templates are helpful when you want to do a more complex deployment of some resources. Basically, what this means is that you can deploy multiple templates from a single main template. You use one single parameters file and then pass those parameters on to the nested templates along the way.
In my previous posts in this ARM template seriesyou can see how to get started, from using tags to how to work with parameters. But one more thing I want to show is how to work with more complex deployments, and that´s where nested templates come in.
The goal of the deployment
With this ARM template, I will deploy a Log Analytics workspace along with a bunch of performance counters and a bunch of saved searches (queries). The information I´m including is something I´ve based on how SCOM collects information about things as CPU usage, memory usage etc. Near real time performance counter collection is cool, but how often do we really need that?
The timing of the collection intervals I´ve gone with here is either five or ten minutes.
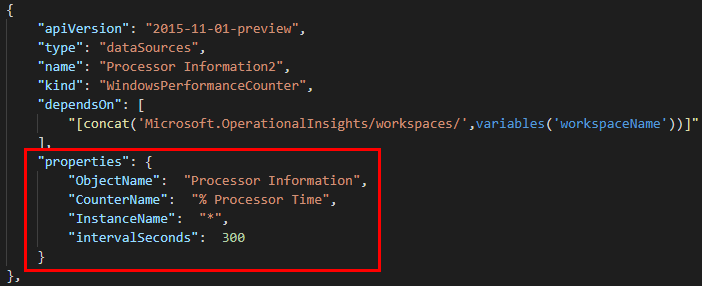
Adding a performance counter to the template
When wanting to add anything, such as in this case a performance counter or an event log, we need to look in the resources section of the resource itself. In this case it´s a workspace.
As you can see below, there are some information needed, but everything is quite straight forward once you get a hold of it. The name of the resource as seen below needs to be unique for the template. There are a total of twelve performance counters added with this template, along with the System, Application and Setup event logs.
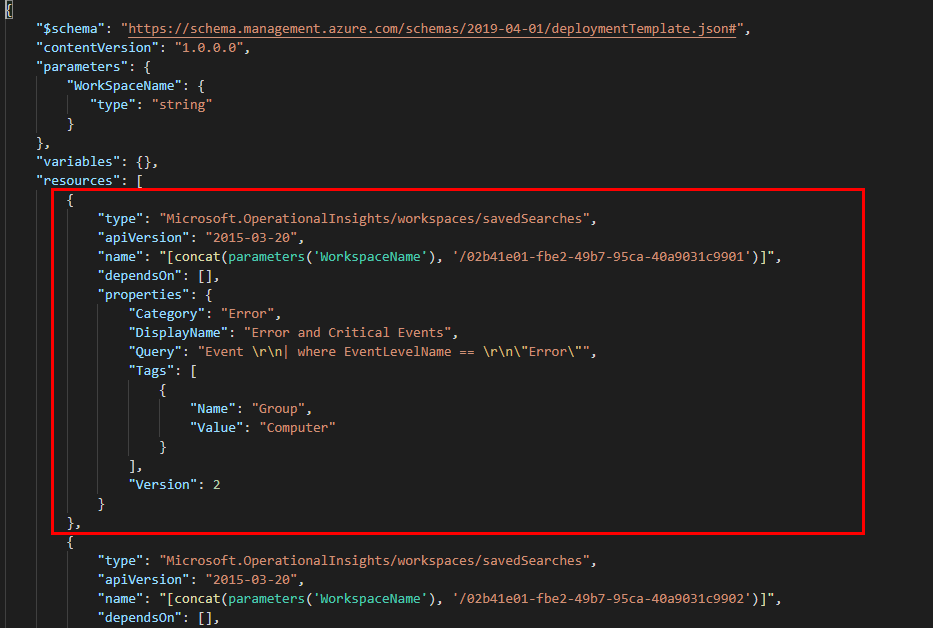
Adding saved searches to a template
Looking at the template to be used as the nested template, there are some things to tink about. First, the parameter (in this case WorkspaceName) can´t have a value. Just define it as string as seen below. This way, the vaue will be used that we´re passing along from the main template.
When it comes to the resources, it´s not a big difference in how you write it. In this case we include saved searches as seen below, but it could just as well be an automation account, storage account or whatever. The same thing goes for other resource types as well.
Looking at the “Query” section below, the \r\n in the query are JSON formatting to switch line in the query.
Calling the nested template
What I´ve done for this demo is that I have uploaded the template I will be calling to an Azure storage account that allows anonymous access. In other words, you can use this URL when trying it out yourself.
This variable will be used when the main template calls the nested one, and knows where to find it.

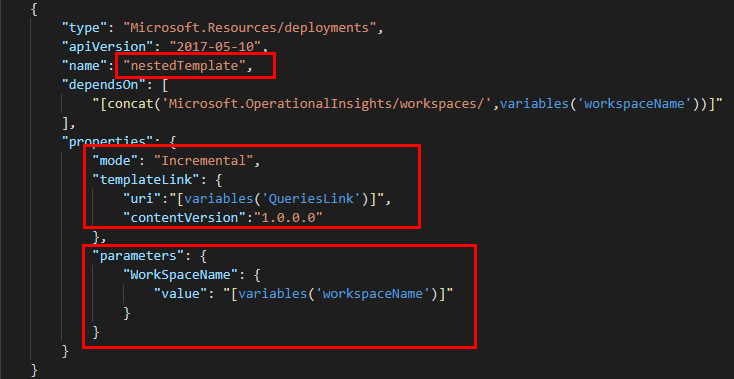
Using a nested template is quite easy actually. Just need to understand the language to be used first (of course). It goes in to the template as a resource and there are some things you need to be aware of.
In the properties section, set the mode to incremental and the URI to the link where to find the nested template. To make thins easier and look cleaner, I have created a variable containing the URI of the template.
You can also choose to pass parameters on to the nested template. See below for how that´s done. This is why you should never set a value for the parameter in the nested template as I mentioned above. If there is a value in the nested template, the value you pass on from here will be overwritten by the default value in the nested template.
Deploying the template
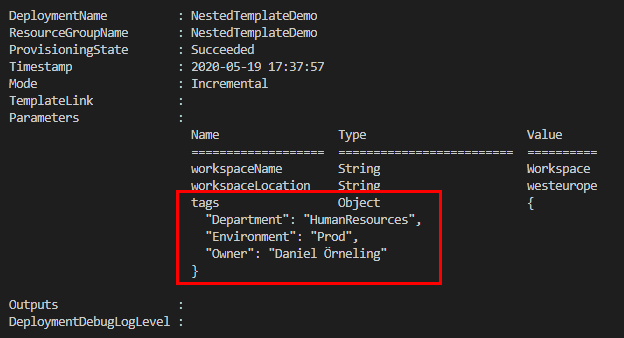
As usual, I have used a PowerShell script to deploy the template. Find the link in the end of the post.
As you can see there have been some tagging, you can see the workspace name and location.
Looking at the results
When we look into the advanced settings section of the workspace, we can see that our performance counters have been deployed. Together with the timing intervals I mentioned above. These counters will now be collected from the servers reporting to the workspace, and can be used when writing queries.

When it comes to the queries we deployed with the nested template, these can be seen in the Saved Searches section of the workspace. Some queries with basic checks for CPU, disk and memory (and some more) that can be used to generate alerts when something happens with your server(s).

Summary
When I first heard of nested templates I thought it sounded cool but awefully complicated. However once I started looking into it, it turned out to be cool and surprisingly easy to get going with.
This is a great way to divide a large main template into a smaller main template with multiple smaller templates to be called. This makes it a lot easier to build more complex solutions as these can be tailor made including just the components you want.
I have uploaded the templates and the PowerShell deployment script to my GitHub repo, which you can find here
If you havent read my previous posts about ARM Templates you can find them below:
- Getting started with Azure ARM templates
- ARM Templates: Working with naming conventions
- ARM Templates: Working with tags in Azure
- ARM Templates: Working with parameters in Azure
As always, if you have any comments or questions, leave a comment below and I´ll get back as soon as possible.
Stay tuned for more posts on cool Azure technologies.
Comments