
ARM Templates: Working with parameters in Azure
Working with parameters in Azure is something I want to discuss a bit more than what I´ve done earlier. Azure tags have recently been covered on this blog, my previous post about that can be found here. Since I posted that article, I had another Azure blogger, Martin Ehrnst who is also an Azure MVP his blog here reached out to me teaching me a few things. When I did the last Azure tags post, I created one parameter for each tag I wanted to create. However, that´s not necessary.
Instead of creating one parameter for each tag, I have switched over to a new way of doing it. Instead of creating a single string, I create the tags as an object type. This means that I will be able to pass multiple values (in this case its tags) as one parameter instead. Have a look below.
The single value way vs the multiple values way
The two examples below show the single string way, while the other shows the object type way. By doing this we can shave off lots of code, but we can also save a lot of parameters. For this small example it makes no real difference in functionality. But in larger deployments it can help as there´s a limit of 255 parameters per deployment.
The amount of tags I put in is the same, but here it´s combined into one single parameter instead of three. The main difference is that I erase the single parameter (the bottom square) and rely only on the upper one instead.

Using the parameter values
When referencing the values of the multiple value parameter, there is a slight change. Before, we could just reference the whole parameter, but now we need to break it down a little.
Before we had to write “[concat(parameters(‘Department’))]” for example, but now we need to write “[concat(parameters(‘Tags’).Department)]” instead. In other words, we change the main parameter we´re calling and adding the value which in this example is Department.
This way of doing things is not limited to tags in any way, but it can be used for any parameter of your choice.

Changing the parameters file
Now when we´ve changed the way we´re writing the parameters, we also need to update the parameters file as well. Of course, you don´t need a template file, but I highly recommend it. Thatway you don´t have to edit the main template every time you want to change an input value. What we need to do is to add the different values into the “value”:{} section of the parameter. As you can see below, it´s pretty much the same but with some minor changes.
The Department parameter in the bottom square is not in the final parameters file. It´s only there for the purpose of this demo.

Deploying the template
When deploying the template, I have used the same PowerShell script I´ve been using for the past few blog posts in this ARM Template series.
What you see below is the output in PowerShell after a successful deployment.

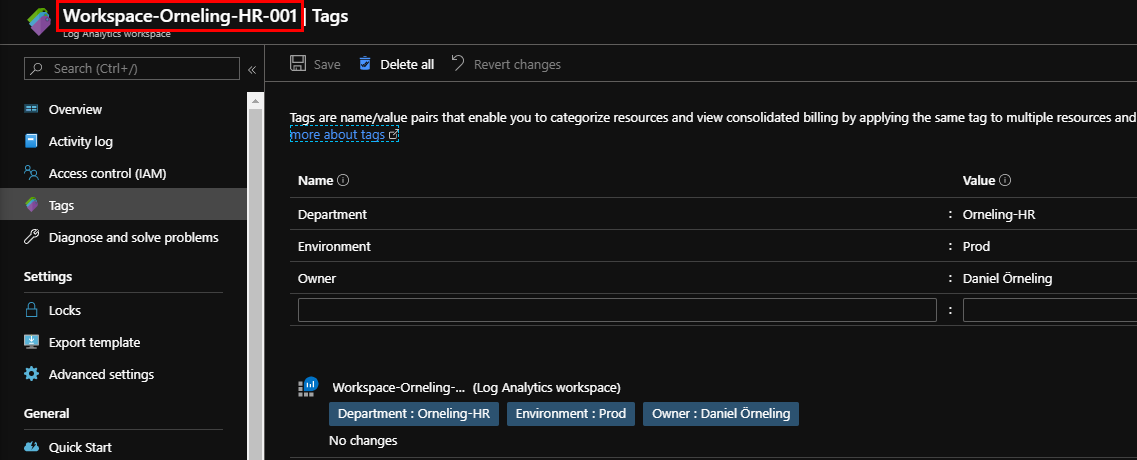
Looking in the Azure portal we can see the tags are added just as expected. There´s no difference in the functionality with this better way of doing parameters, it just saves us time and lines of code.
Summary
So this was another blog post in my series where I go through how to work with ARM Templates for you Azure deployments. As soon as I heard about this I checked it out, and in about 10 minutes I was up to speed and had made the changes necessary to make the change. Thank you Martin!
I have posted the sample templates and the deployment script I´ve been using to my Github repo and you can find the files here. There´s also a great article from Microsoft here, which explains the things I´ve done here if you´re curious about more.
If you havent read my previous posts about ARM Templates you can find them below:
If you have any questions or concerns, leave a comment below and I´ll get back asap.
Comments