
ARM Templates: Working with tags in Azure
Working with tags in Azure is a really important thing. It´s something that everyone should do as soon as they start to move workloads to Azure. In my last two posts I showed how to get started here. And here I showed how to comply with your naming conventions for Azure resources as well. The two examples I showed in those posts aren´t at all complicated, but they lack one major thing. Tags.
First things first, why should you work with tags?
Tagging resources is a way to keep track of things like who is the owner, what department it belongs to, the environment and cost center to name a few examples. In a small Azure environment with just a few resources, it´s quite easy to keep track of the resources as is. But once you build a larger environment you´re going to need tagging to keep track of the different resources.
Using tags is also a way to control how much money a team is spending on Azure resources. This way you can get a cost analysis based on certain tags.
Get started using tags in Azure
For this example, I´m going to use an ARM template to apply tags to resources as a part of the deployment. The example is the same as was used in my last post about naming conventions, but with a few changes.
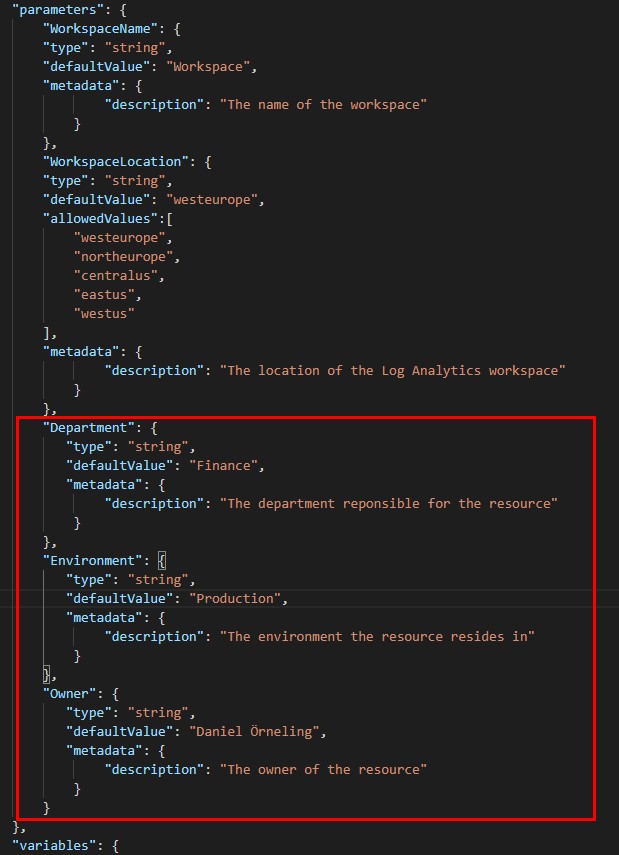
The first thing I have done is to add three new parameters: Department, Environment and Owner. Nothing fancy, you just copy a previous parameter and switch out the values to the new one you desire.
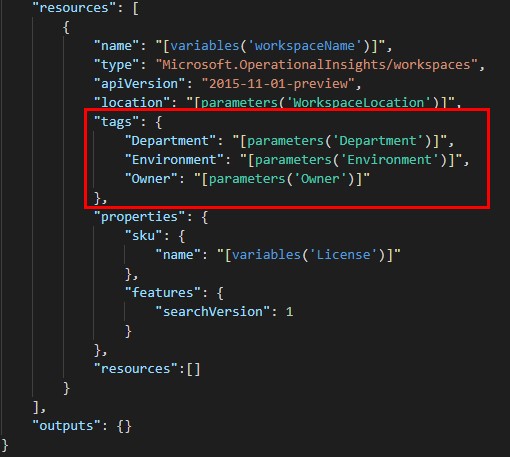
The next step is to insert the tagging information in the ARM template in the right place. It should be inserted like you can see below right between “location” and “properties”. You just insert the tag as “TagName”: “[parameters(‘TagName’)]” followed by the rest of the tags.
And that´s it for the arm template in this example. You just need to repeat this process for each different resource you have added to your template. Just paste the information right between location and properties on the rest of the resources and you´re good to go.
Deploying the template and verifying its function
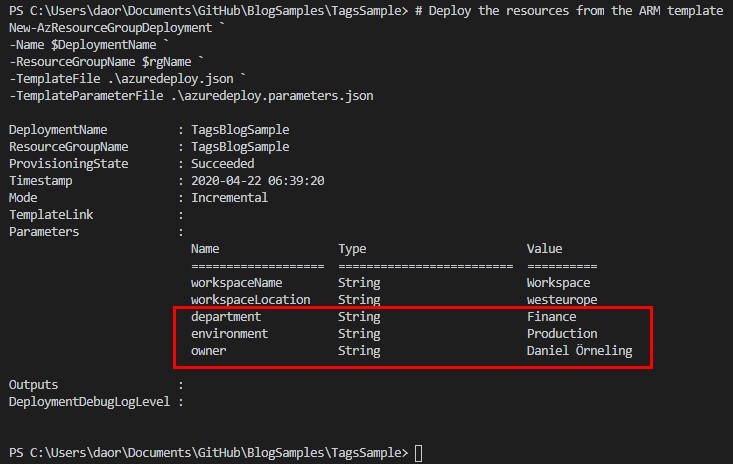
I used the same PowerShell script as last time to deploy the ARM template. As you can see here it lists the parameters we typed in and all looks good.
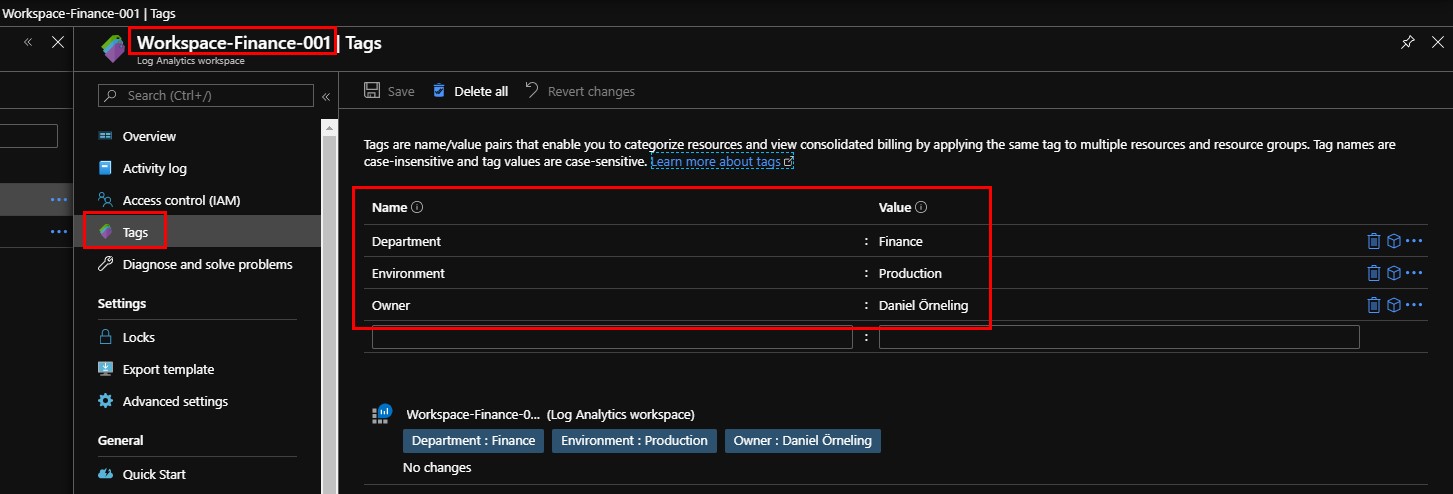
Looking in the Azure portal we can see the new workspace created, along with the tags we provided.
Tagging resources isn´t at all complicated, but it adds a real value useful in multiple scenarios. Just to be able to check who is spending the most money or to see which department using the most resources is a completely new way to keep track of the expense in the company.
Checking all resources with a certain tag
As you can see in the below picture you can push the button, I pointed out to see all resources with that certain tag. In my case where it´s my own lab environment there’s no chock that most resources are tagged with my name, but in a live customer environment this is a great way to find the person responsible for the resource. In this view, you can also add new tags to a resource.

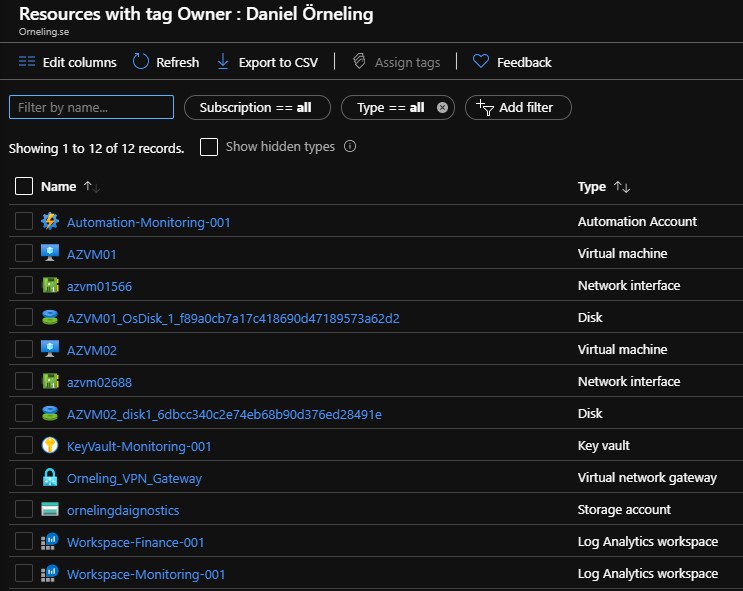
Below is a view where you can see all resources tagged with me as the owner.
Summary
This post isn´t as long as they usually are, and that´s basically since tagging resources is a real straight-forward task and not at all complicated. Even though it isn´t complicated at all, it really adds value since we can follow up on resources in a completely different way than we could before tags was introduced.
With this post I wanted to show how simple it is to start tagging, but also to explain why you should use it. I really think that tagging resources should be a part of the routines when deploying new resources, as it helps big time when finding owners or doing cost analysis for the resources.
I have uploaded the ARM template sample to my GitHub repo and you can download it from here. As always if you have any questions do not hesitate to leave a comment below.
Comments