
Reset AD user password using Azure Automation
So the time has come, holidays are over and we have stepped into another year. This time it says 2016 and I think we are looking into a great year with tons of possibilities, such as System Center 2016, Windows Server 2016 along with continuous updates to Operations Management Suite and a lot more. I ended last year with writing a series of five blog posts about how you can use Azure Automation and OMS to finish some of your repetitive tasks for you. Find them all below and take a look. Who knowns? This might be just what you´ve been looking for?
- Import new modules into Azure Automation (Part 1)
- Automatically create AD users with Azure Automation and OMS (Part 2)
- Create Azure AD users with Azure Automation (Part 3)
- Create service accounts using Azure Automation and OMS (Part 4)
- Delegate automation rights in Azure Automation (Part 5)
Now that I have covered how you can import modules, create users and delegate rights to the runbooks I thought that I should create another runbook to help you out with another repetitive (and boring) task. If you´re an administrator, most likely you have been approached by a user with an expired password or that he/she has just forgotten about their password during the holidays. Wouldn’t it be nice if you could delegate this task of resetting passwords to the colleague itself or if the colleague could just turn to the person next to him/her and get it solved instantly?
This post will show you how you can use Azure Automation and OMS to reset your AD password by using the Hybrid Worker Role (more information about this in the previous posts). By combining this post with post number 5 in the above list, you can delegate rights to your users to easily reset their own password as long as they know about their last password used.
Preparing for the runbook implementation
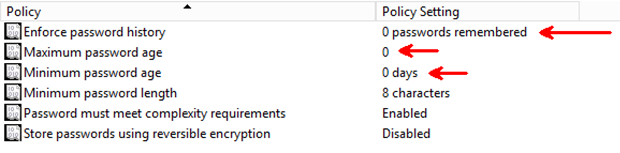
In order for this to work, some settings are required concerning your password policy in the domain. When working with this runbook I changed the settings in my Default Domain Policy GPO to what you can see below. Not the best settings for a company but then again, I´m quite alone to administer and using my lab environment J
The settings can be changed in Computer Configuration\Policies\Windows Settings\Security Settings\Account Policies\Password Policy of your GPO.
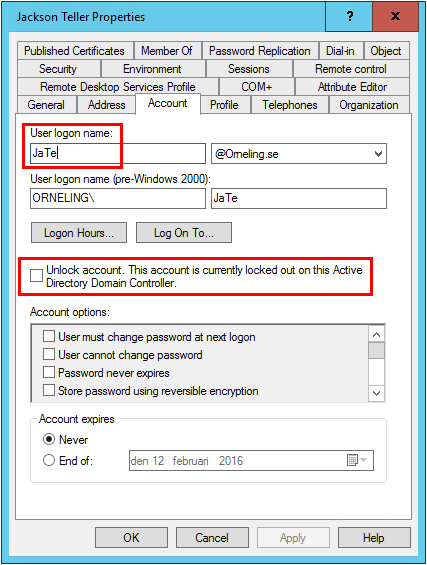
To let you know that the runbook actually does what I say it will do, I made sure to lock out the user. If you read the other posts, you will understand why Jax Teller shows up as an employee. This time he has forgotten about his password and got locked out of the AD.
Before you move on to firing up the runbook, make sure to register an OMS agent as a Hybrid Worker. Find out how to do this in post number 2 above.
After you have registered a Hybrid worker, you must delegate rights to the OU of the user to the computer account running the OMS agent. If you forget to do this, you will not be able to execute the runbook. It took me a while to figure this out the first time so don’t miss this and you will save yourself the head ache and frustration J.
Implementing the runbook
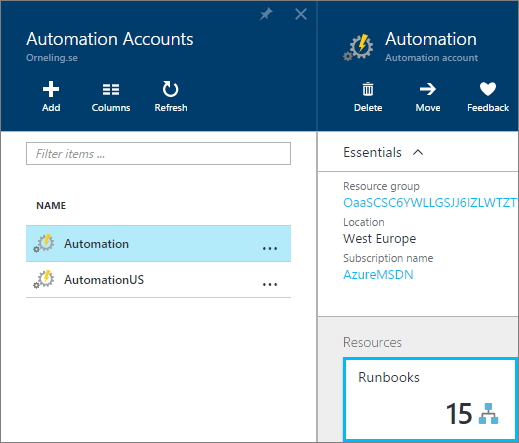
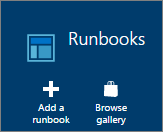
As usual, you have multiple ways to implement the runbook in your own Azure subscription. You can download the script directly from get it from GitHub here or get it from within the gallery in the Azure portal. Go into your Automation account and then head on to Runbooks just as seen below.
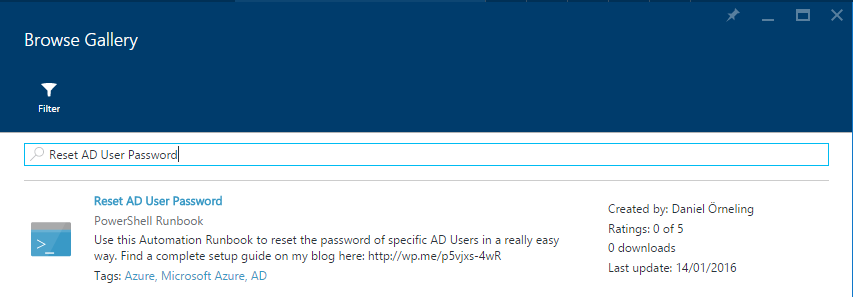
If you want to get it from within the portal, just click “Browse Gallery” and search for “Reset AD User Password” and you will see it like below.
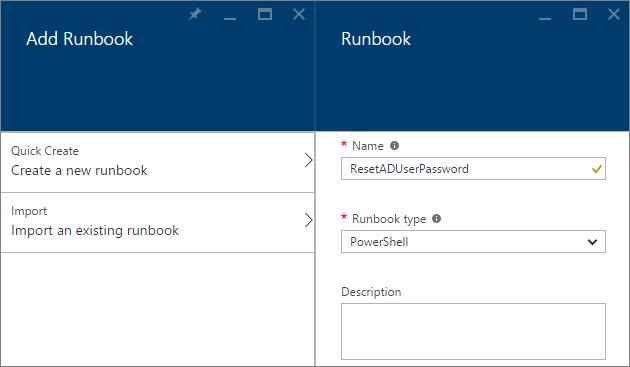
To create the runbook from scratch, click “Add a runbook”.
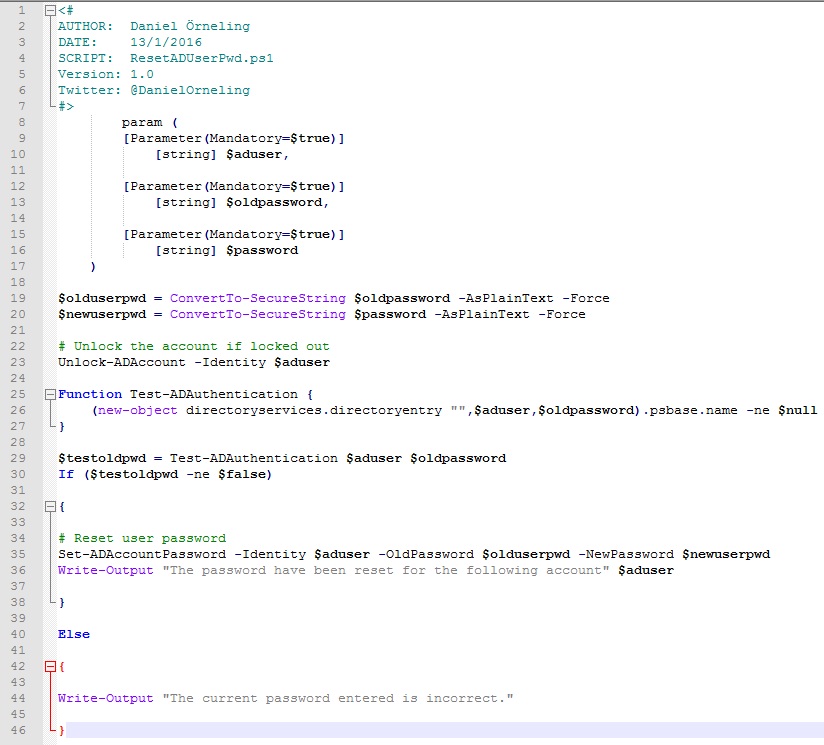
Now you have two choices, either importing the PowerShell script which you downloaded from my OneDrive or to paste the script into a new runbook. I will show you how to create a runbook below. Give it a name, choose PowerShell as “Runbook type” and move on. And of course you can name the runbook whatever you like, the name isn´t in any way hard coded into the runbook.
Paste the script in the window and then click Save followed by Publish. Your runbook is now live and ready to roll.
Testing the runbook
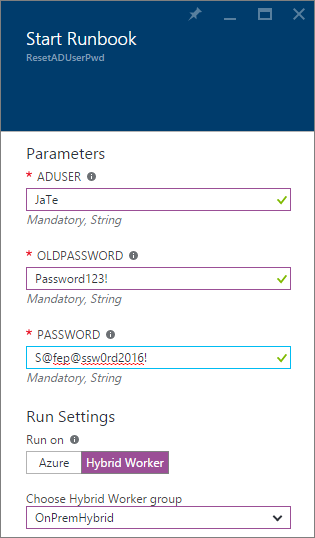
To fire up the runbook, click Start and move on.

Type in the username (sAMAccountName), the current password and the new password. Then choose to run on Hybrid Worker and pick the group you registered earlier. You´re now ready to move on and start the runbook.
Please note: The reason why the input is visible as plain text is because of limitations to the input types. Instead of using a regular string which you will see below as plain text, to get rid of the plain text it would take a secure string which would hide the password and instead of letters you would´nt see the actual password. As of right now this isn´t a supported type of input so that´s why you will see the passwords as plain text below. If you just like me want this to be fixed, head over to user voice here and vote for it to let Microsoft know about this demand.
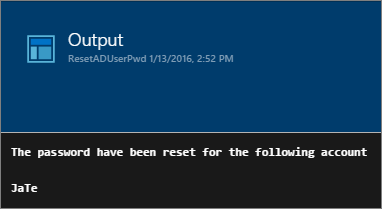
Click the Output button to the right to see what is happening. If everything went well, you will see the below output and the user will now have an unlocked account with a new password.
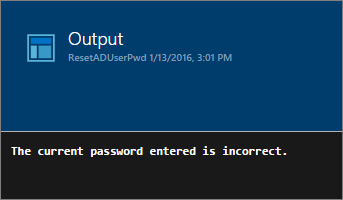
If I execute the runbook once again with the same input, the old password entered will of course be wrong and I will receive the below message. This means that not any user can type in any username and then reset the password to take control of the account.
Looking back at the account in the AD, we can now see that the user has been unlocked and is now ready to log on once again.
Summary
Now you have seen how you can easily implement your own self-service password reset. With this approach you will not only save yourself the burden of unlocking accounts and resetting passwords, you will also please your users who can now reset their own password instead of running (walking slowly) to you or your IT dept. colleagues to get a new password. With the possibility to delegate rights to automation accounts, we can make a lot more tasks available directly to our users. Since you (as of now) can only delegate rights directly to the automation account you might want to consider the design of your automation accounts. If you use my runbooks to create users from my previous posts, you might want to put them into one automation account and delegate rights to this account to a group of HR folks and this runbook in another automation account and then delegate rights to this account to all users. This way you separate the “anyone-can-execute” tasks from the “only-a-few-will-execute” tasks such as creating new users.
If you like what you´ve seen here or have any comments, please leave a comment and let me know what you think about it.
Comments