
Create Service accounts using Azure Automation and OMS
The last weeks I have blogged more about what you can do with Microsoft Operations Management Suite (OMS) and Azure Automation. This have ended up in three posts on how to create both on-prem AD users but also Azure AD users. To make life even easier for you, I have now created a runbook which lets you create new on-prem service accounts. The best part of it? It´s completely automatic and the only thing you need to provide is the system name (SM for Service Manager for example) and the function (Workflows, to use for SCSM workflows etc.), the rest is handled for you. You can find the three previous posts below.
- Automatically create AD users with Azure Automation and OMS
- Create Azure AD users with Azure Automation
- Delegate automation rights in Azure Automation
Setting up the prerequisites
Since this runbook will create on-prem AD users, you will need a way to connect Azure Automation and OMS to your on-prem AD. This is done using the Hybrid Worker Role which is a part of Azure Automation and OMS. This needs to be set up using the guidelines found in the post Automatically create AD users with Azure Automation that I also mentioned above.
This is really important as you won´t be able to use this runbook until you have followed the steps in the post above. After you have taken care of these steps, carry on as below.
Another really important thing is to delegate control in the AD to the computer account running the OMS agent as I have also mentioned in the post referred to above. Without this, it won´t work.
Creating the runbook
Head over to the “new” Azure portal and then navigate to Automation Accounts and to your Automation account you´ve created. (If you haven´t got any automation accounts set up, check this out. Now, click Runbooks.

At this point you have two choices. Either you import the runbook from the gallery or you create a new runbook. Below, I will show you how I created the runbook when I started working with this post. If you want to import the runbook from the gallery, just search for “Create AD service accounts” or my name and you will find it. Click Add a runbook.

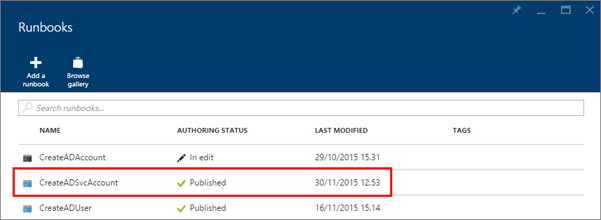
Give the runbook a name, the reason why it turned out red here is because I had already created the runbook. If you want to import the runbook, you can download from my OneDrive here or from Github here. Under Runbook type, choose PowerShell and move on.

If you have downloaded the runbook, then you can paste the script into the windows below or import it and then clicking OK. Then click Save followed by Publish. There are a few things you need to change in order for this to function properly for you. The first thing you need to change is the domain. Instead of Orneling.se, it should contain your domain to make it right in your AD. The other thing is that you need to change your OU path where the account will be created. An example string is found below.
“OU=Users,DC=YourDomain,DC=Com”

The complete script below:
		param (
		[Parameter(Mandatory=$true)]
			[string] $system,

		[Parameter(Mandatory=$true)]
			[string] $function
	)

$account = $system + $function
$newaccount = $account + "_Svc"

<# Generate a secure password #>

$characters = 'abcdefghkmnprstuvwxyzABCDEFGHKLMNPRSTUVWXYZ'
$nonchar = '123456789!$%&?+#@'
$length = 12  #The total length will be 14, the last two characters are nonchar.

<# select random characters #>

$random = 1..$length | ForEach-Object { Get-Random -Maximum $characters.length }
$random2 = 1..2 | ForEach-Object { Get-Random -Maximum $nonchar.length }

$private:ofs= ""
$password = [String]$characters[$random] + [String]$nonchar[$random2]

<# Create the account #>

$displayname = $system + " " + $function + " Service account"
	$SamAccountName = $system + $function + "_Svc"
	$UserPrincipalName = $account + "_Svc" + "@Yourdomain.xx" #Insert your own domain here
    $AccountPassword = ConvertTo-SecureString $Password -AsPlainText -Force

	 New-ADUser -SamAccountName $SamAccountName `
	-UserPrincipalName $UserPrincipalName `
	-DisplayName $displayname `
	-givenname $system `
	-name $displayname `
	-surname $function `
	-ChangePasswordAtLogon:$False `
	-Description "This service account was created using Azure Automation in OMS. " `
	-path "OU=Users,OU=Orneling,DC=Orneling,DC=Intra" ` #Change this OU to match your needs
    -AccountPassword $AccountPassword `
    -Enabled:$True `
    -PasswordNeverExpires $True

Write-Output "The account created is $($newaccount) with the password $($password)"
Executing the runbook and creating the user
Okay, so now that the runbook has been created, edited and saved it´s time to rock and roll. Click on the runbook you just created.
Click start and then you will need to specify two parameters. Under System I wrote SM for Service Manager and under Function I wrote Workflows for the workflow account. With this naming, I am using 15 letters in the user name (including the _Svc which will be added in the end of the name.
Choose to run it on a Hybrid Worker instead of Azure, then choose the Hybrid Worker Group you created earlier. Click OK to fire it up.

Now, click Output and you will soon see the user name and an automatically generated password for the account. Copy these credentials and save them somewhere safe (I´m using Keepass). But wait, can I trust this is really happening? Yes, you can J.

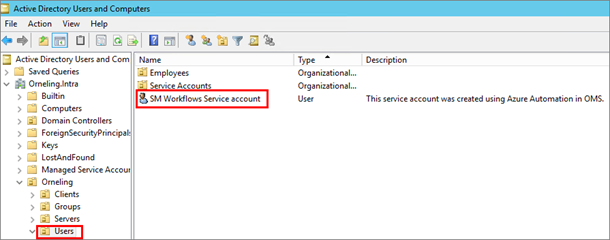
Heading back to my AD, you can see that the user is created with the display name, description and in the right OU.
As you can see below, the user account worked just fine when I wanted to log on to a server (after giving it some rights on a server of course) and I could now use it to install Service Manager for example.

Summary
With this post, you have seen the power you unleash when using OMS, Azure Automation and PowerShell all together. Since this solution is completely automatic (besides from having to type the System and Function), you can be sure that your naming standards for service accounts will always be met and the passwords won´t be something simple such as “P@ssw0rd1” or any other simple password. I will continue to develop these runbooks sobear with me and these version 1.0 runbooks.
Now that you have seen more of what you can do with OMS and Azure Automation, have you tried it out for yourself? It would be nice to know so if you´d like to, then leave a comment below. As always, if you have any questions about the post then you can leave a comment below J.
Comments