
Onboarding Operations Management Suite: Part 1
During the keynote at Microsoft Ignite on May 4th in Chicago, Satya Nadella announced the availability of Microsoft Operations Management Suite. To those of you who are familiar to Operational Insights, this will be even more familiar. Azure Operational Insights has now moved into the Operations Management Suite (OMS) where you will find all of what you´ve seen in Operational Insights but this will also be the place where you manage Azure Site Recovery, Azure Backup and Azure Automation (and more to come). I have in a previous post showed how to onboard OpInsights but in this post I will go through how to onboard OMS using SCOM. Separate onboarding without SCOM will follow in the next part of this blog. For this blog post, I have used a SCOM management group built upon SCOM 2016 Technical Preview 2 which you can read more about here. Creating the Workspace
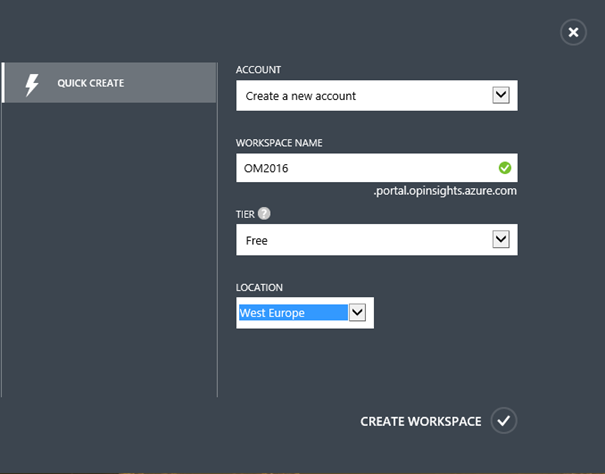
Log on to the Azure portal (or go to Microsoft.com/OMS and register from there) and click New - App Services - Operational Insights and then click Quick Create. Give your workspace a name, choose your tier (Free gives you a limit of 500 MB per day with a retention time of 7 days). Choose your location and then click Create Workspace.
Connecting SCOM to OMS
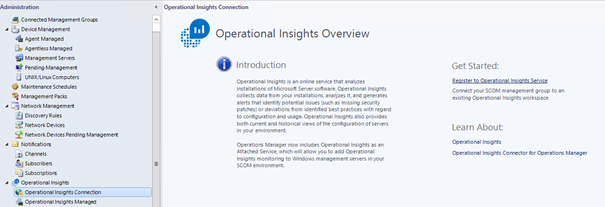
When you´ve created your workspace, open the Operations Console and navigate to the Administration pane. To the left, click Operational Insights Connection (this will be re-branded, probably in one of the next two Update Rollups). Then click “Register to Operational Insights Service”.
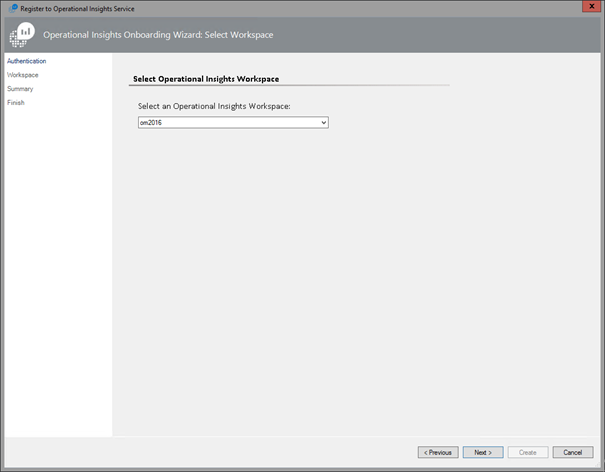
Log on using either a Microsoft account or an organizational account. Just make sure you have admin rights to the workspace (admin in Azure). In my case, I used the same Microsoft account to create the workspace as I then did when logging in in the picture below. After having logged on, pick your workspace you just created and carry on.
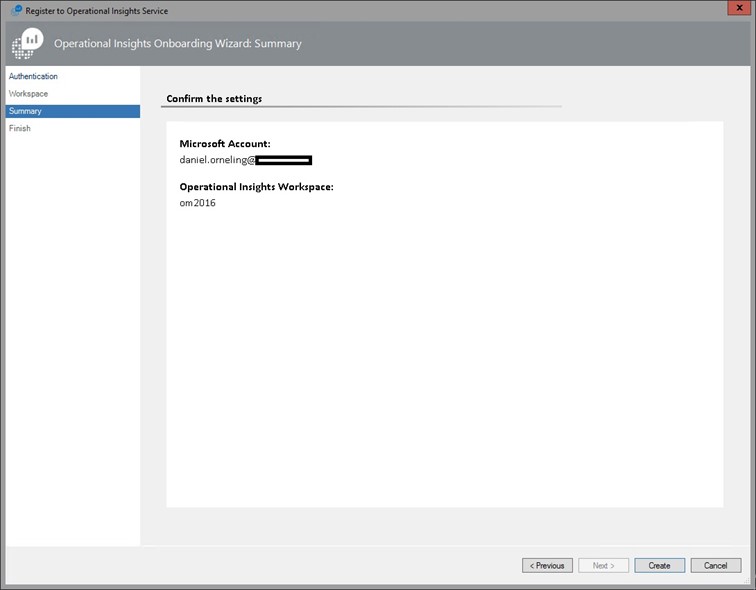
Check the summary page out and then click Create.
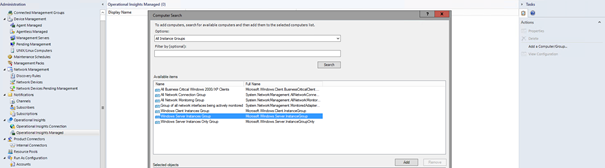
The next step is to choose which servers should be processed by OMS. In this case I picked “Windows Server instances Group” but you can just as well create your own group containing just the servers of your choice. Add your group and click OK.
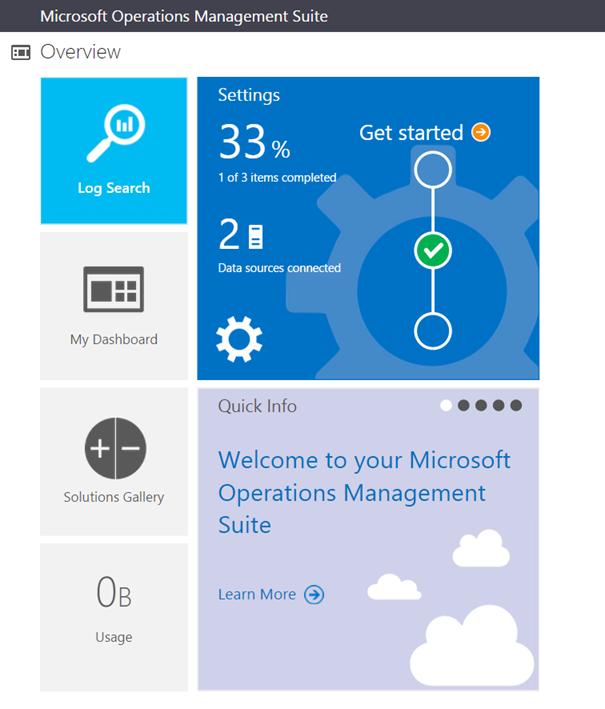
Now that we´ve connected SCOM to OMS, its time to head back to the portal again to make some changes before we can start using it. Start by clicking Settings seen below.
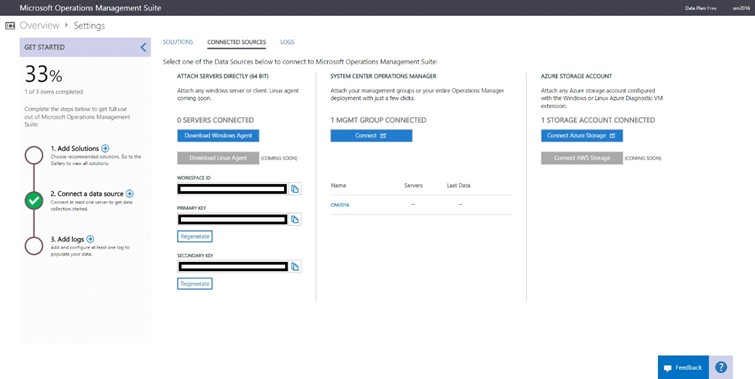
Head over to connected sources and find information about your SCOM group, workspace ID and workspace key. Find out more about these two last things in the next blog post.
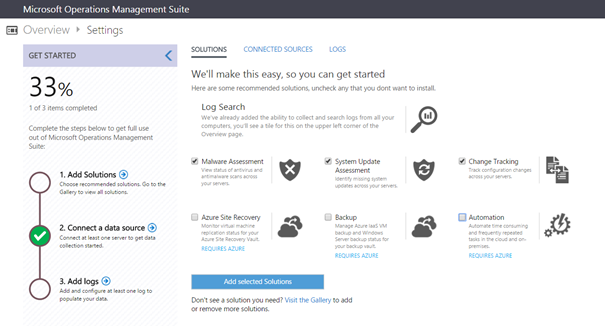
Navigate to Solutions instead and place a checkmark for those that you want to include from the beginning. Since I don´t have any Backup or Automation setup yet, I´m gonna leave those right now. There are more solutions to add, do this by navigating to the start screen by clicking the square next to Overview in the upper left corner in the picture. Then navigate to Solutions and add those that you want to use.
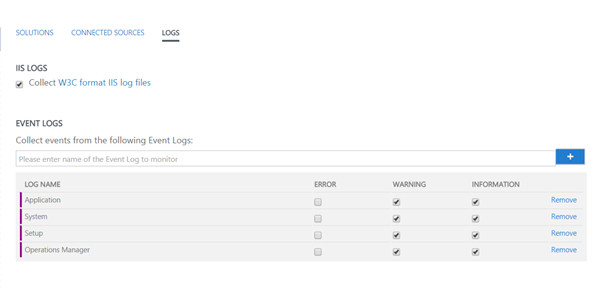
To be able to collect logs, navigate to Logs and then add the ones you want to check out. Hint: start writing and you will see an auto-complete function to help you point out the log you want. Then choose what level of information you want to collect and click Save.
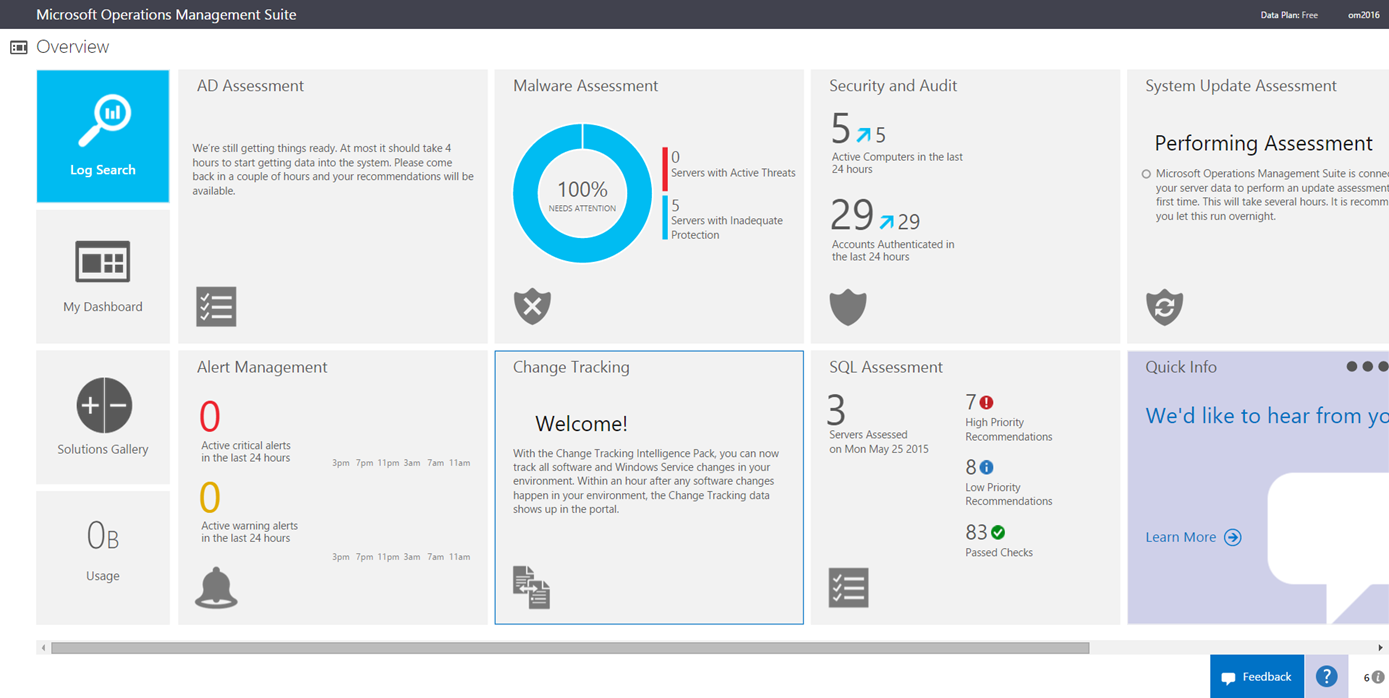
Checking back a few hours later
When you first add the management group, the solutions and the logs it will take some time before you actually see something popping up in the portal. The information you see below took about two hours to populate and “System Update Assessment” took about 4 hours to complete. To demonstrate the power of this solution, I´m gonna go into the SQL Assessment tab to find out more about these recommendations you can see below.
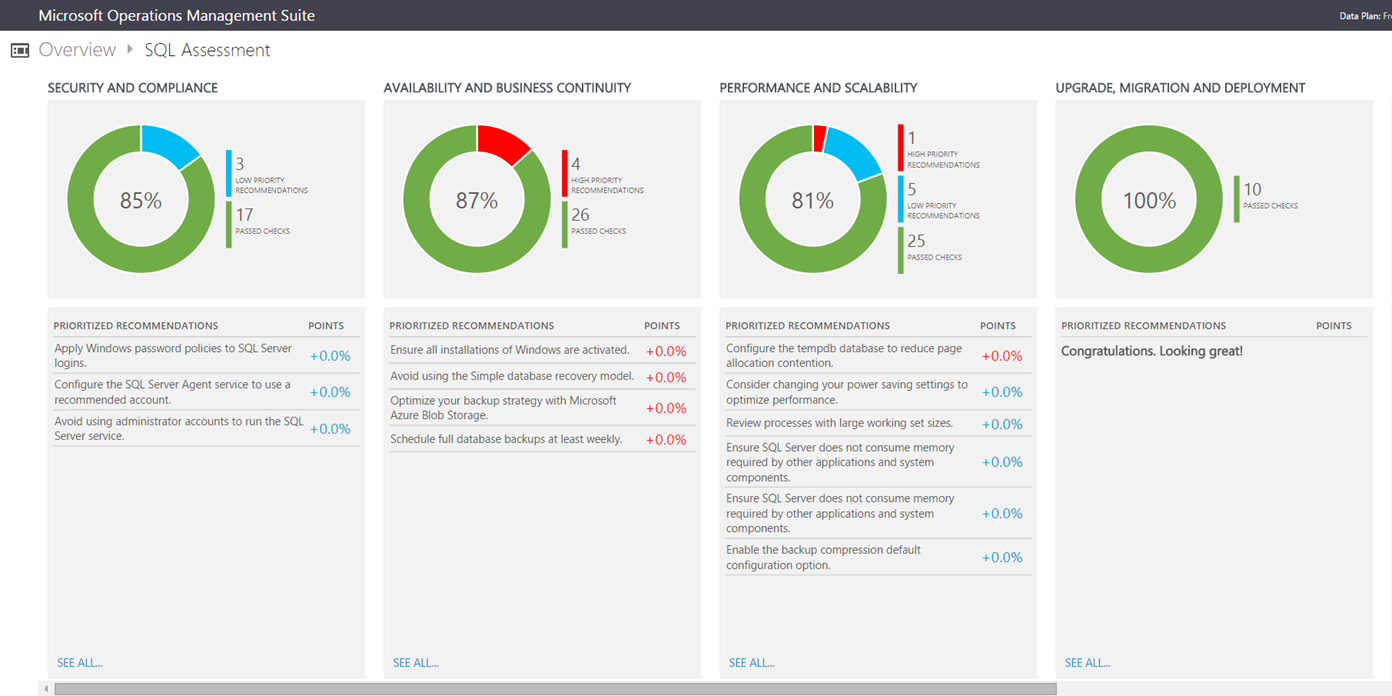
As you can see below, there are several different categories of recommendations which should be considered. It could be everything from using admin accounts to run SQL Server to missing backup routines.
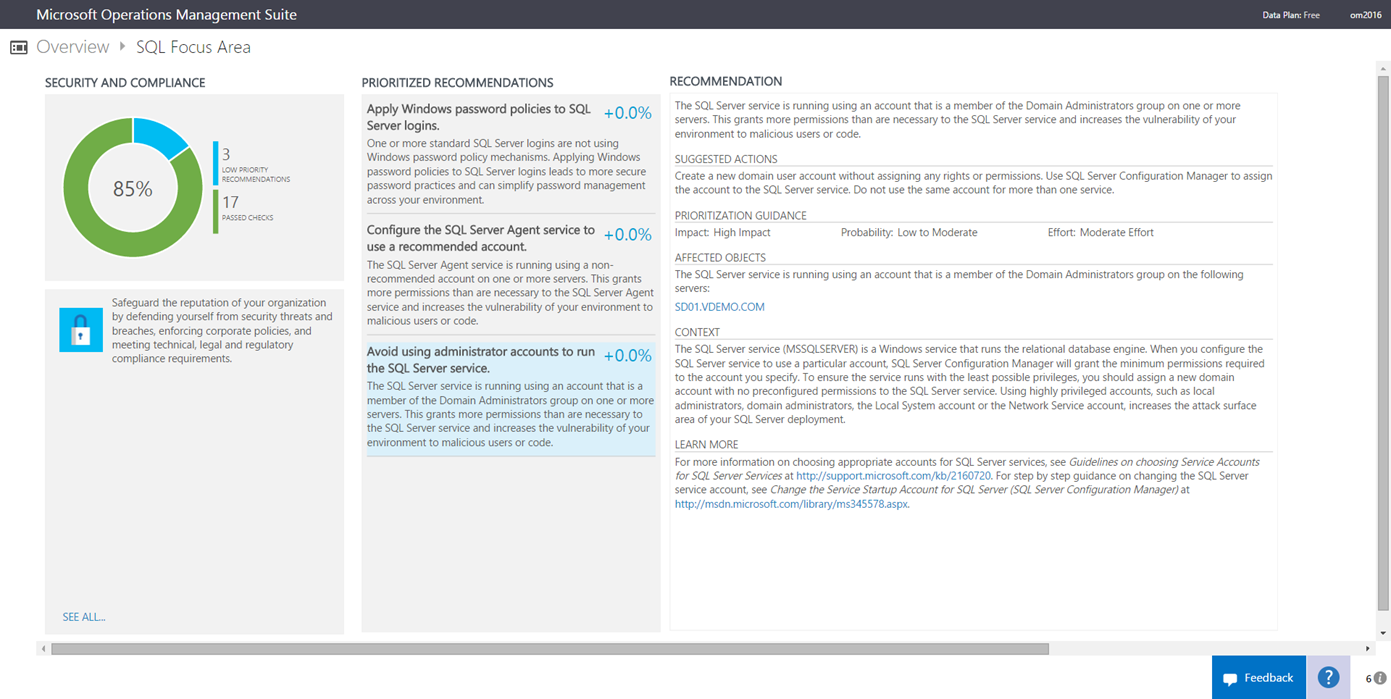
By clicking on the “Security and Compliance” tab I will be presented the recommendations Microsoft has for me in this case. In this case as you can see below, one of the servers are using an admin account to run the SQL Server service. If your familiar to SCOM, you will also recognize the recommendations as this reminds of the Product Knowledge from the management packs imported into SCOM. This will guide you by telling you both what´s wrong and how to solve the problem.
Summary
What I´ve shown here is just a small part of the Operations Management Suite (OMS). I haven´t even begun talking about the different Solutions, the different logs you can manage, how you can deep-dive into your logs and how to present the information. In my next blog post on OMS I will go through how to connect stand-alone servers to OMS and start collecting data from those. If there are any questions or if you like me to dig deeper into something, leave a comment below and I´ll get back as soon as possible.
Comments