
Send mail from SCOM
Have you ever wanted to send mail from SCOM just to notify someone of an alert and to easily provide them with all the information they need? Do you wish you could do this without adding notifications etc. inside SCOM? If you answered yes to those two questions, then you really should keep reading. The standard way in SCOM to send alerts via mail is to configure a SMTP server, add subscribers and then add subscriptions. That is great and provides you with the information you need but there might also come a time when you want to forward an alert to someone who´s not a subscriber in SCOM. Syliance is mostly known (at least to me personally) for their ITSM portal for System Center Service Manager which kicks out the original portal and presents a Silverlight-free portal instead. However, their Send Mail plugin for SCSM has now been released for Operations Manager as well. I saw information on this plugin a couple of days ago and I immediately thought it looked great, but could it really be that easy? As it turns out…yes, it really is as easy as they claim! The solution comes in the form of a couple of management packs which you import to SCOM and then you´re almost good to go. See below for how it´s done.
Installing the plugin
It´s almost a shame to call this section something with “Installing” since it´s just that easy :) Request a trial from Syliance here and then download the management packs needed. Import the MP´s into SCOM and move on to the next part. The product is supported on the following platforms:
- SCOM 2012
- SCOM 2012 R2
- Exchange 2010
- Exchange 2013
- Office 365
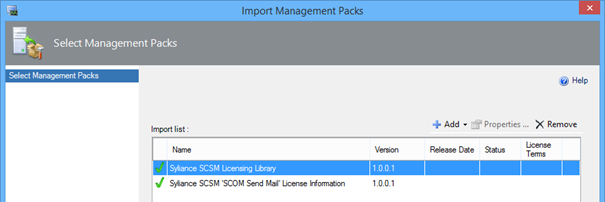
In the first picture below, I´m importing the task and in the second picture my licensing information is imported.

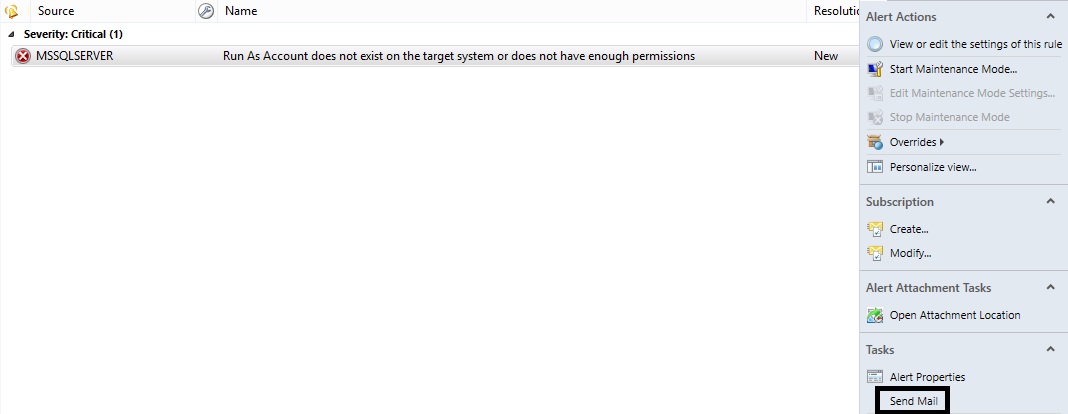
Once the MP´s are imported, head over the the monitoring pane and find yourself an alert to try this out on. Mark the alert you want to forward and choose the “Send Mail” task to the right, just as I´ve done in the picture below.
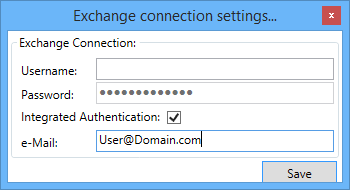
The first time you run the task, you need to configure your e-mail settings. There are three different scenarios here and three different ways to do it. The first is the integrated mode, if you´re signed in with your regular account with your mailbox attached to it just type in your mail address as in the picture below and you should be good to go. Note that the integrated mode doesn´t work if you´re in Office 365.
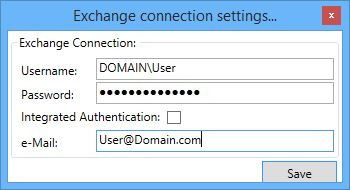
The next option is if you´re logged on with another user than you´r mailbox user. For example your admin account may not have a mailbox attached to it. If that´s the case just sign in with the credentials as in the below picture to take advantage of your mailbox even when you´re logged on with your admin account.
If you´re in Office 365 then you need to log on using your e-mail address as the user name and then type you e-mail address once again in the e-mail field.
Sending a mail
Once you have taken care of the configuration this will be saved until you log on the next time so this is a one time process. You may receive a couple of warning popups the first time running the Send Mail task, if that´s the case you should only have to restart the Operations console.
When the configuration is done it´s time to forward the alert to myself in this case. Type in the recipient of the mail and if you want to add some more information, just put it in “Additional Description”. Another great feature is that you can include attachments like screen shots, log files or whatever you feel like attaching.
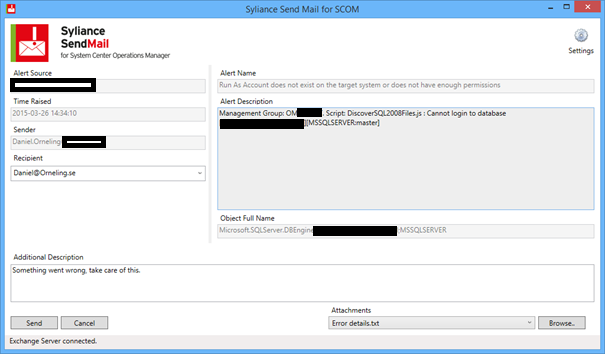
As you an see below the formatting of the mail is really simple and it shows the information needed to dig in with the problem.
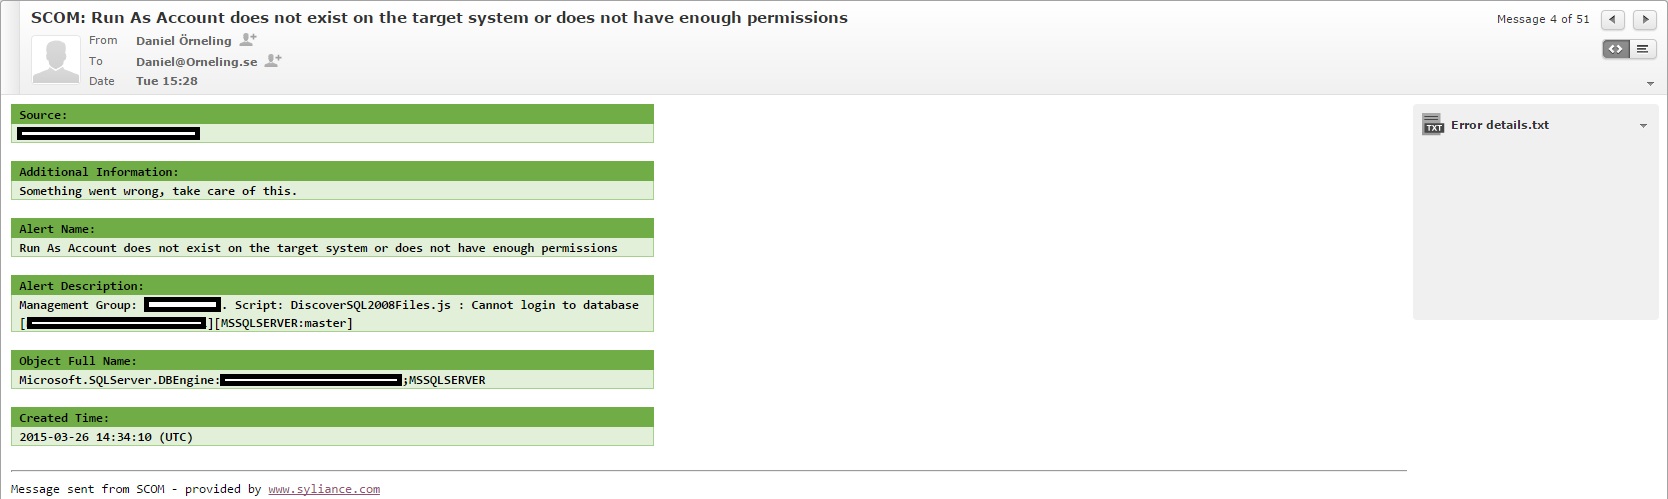
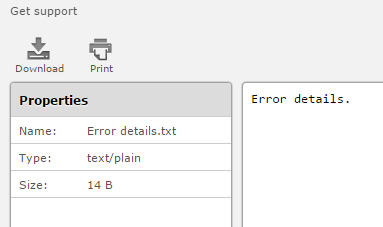
The attachment is also included in the mail making it real easy to find out more about the situation for the technichian assigned to the alert.
Follow up on what happens to the alert
The last thing i want to show is what happens to the alert when you have forwarded it as I´ve shown in this post. The General tab of the alert shows the e-mail recipient as the owner of the alert now that I have received it by mail along with E-Mail as a Ticket ID. These are the fields populated by SCSM when SCOM and SCSM is integrated. If you want to know more about that process, check this post.
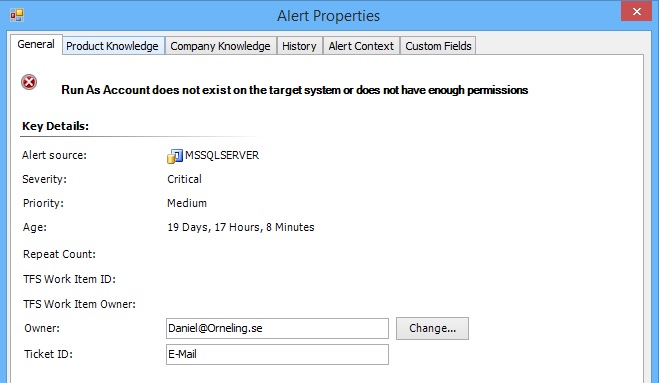
It´s always easy to follow what has happened to an alert and to see who is working with it from the History tab.

Summary
And that´s it for now folks. It doesnt get any easier to forward alerts by e-mail to the recipient of your choice. I think this might turn out to be a really popular plugin to SCOM and the licensing is based on a one-time fee per management group and then there is also an additional license included for lab purpose. If you want to know more about the product, check it out here.
If you have any questions or thoughts about what I´ve shown here, just leave a comment and I´ll get back as soon as possible.
Comments