
Connecting Operations Manager to Service Manager
Some time ago, I wrote a post about why you should connect Operations Manager to Service Manager. The reason why you would want to do this is to make life easier for your helpdesk personnel and to only provide them with one console to work with instead of two. You can read my post on monitoring your environment using Service Manager here.
So, how do you connect these two products to each other and what do you need? The first thing you need is that the both products are on the same level, RTM or SP1. The next thing to set up is the connectors between SCOM and SCSM.
There are two connectors to set up, the Configuration Items connector which transfers Management Packs etc. and the Alert connector which transfers the alerts both ways.
To create an Operations Manager alert connector
- In the Service Manager console, navigate to Administration -> Connectors
- In the Tasks pane, click Create Connector, and then click Operations Manager Alert Connector.
- Complete the following steps to complete the Operations Manager Alert Connector Wizard:
- On the Before You Begin page, click Next.
- On the General page, in the Name box, type a name for the new connector. Make sure that the Enable check box is selected, and then click Next. Make a note of this name; you will need this name in step 6 of this procedure.
- On the Server Details page, in the Server name box, type the name of your Operations Manager management server. Under Credentials, click New.
- In the Run As Account dialog box, in the Display name box, type a name for this Run As account. In the Account list, select Windows Account.
- In the User Name, Password, and Domain fields, type the credentials for the Run As account, and then click OK. This user must be an Operations Manager Administrator.
- On the Server Details page, click Test Connection. If you receive “The connection to the server was successful.”, then you can procede with the wizard by clicking OK.
- On the Alert Routing Rules page, click Add.
- In the Add Alert Routing Rule dialog box, create a name for the rule, select the template that you want to use to process incidents created by an alert which by default should be “Operations Manager Incident Template”, and then select the alert criteria that you want to use. Click OK, and then click Next. All other alerts that don´t match your rule will automatically be using the “Operations Manager Incident Template”.
- On the Schedule page, select Close alerts in Operations Manager when incidents are resolved or closed and Resolve incidents automatically when the alerts in Operations Manager are closed, click Next, and then click Create.
- Start the Operations Manager console.
- Navigate to Administration -> Product Connectors -> Internal Connectors.
- In the Connectors pane, click the name of the alert connector that you specified in step 3.2.
- In the Actions pane to the right, click Properties.
- In the new window, click Add.
- Type the name for this subscription. For example, type All Alerts, and then click Next.
- On the Approve groups page, click Next.
- On the Approve targets page, click Next.
- On the Criteria page, click Create and finally OK.
How to validate the creation of an Operations Manager alert connector
Confirm that the connector you created is displayed in the Service Manager console in the Connectors pane.
Confirm that incidents are created in Service Manager from alerts in Operations Manager.
How to create an Operations Manager CI connector
In the Service Manager console, navigate to Administration -> Connectors.
- In the Tasks pane, under Connectors, click Create Connector, and then click Operations Manager CI Connector.
- Follow these steps to create the Operations Manager CI Connector;
- On the General page, in the Name box, type a name for the new connector. Make sure that the Enable check box is selected, and then click Next.
- On the Server Details page, in the Server name box, type the name of your Operations Manager management server.�
- Under Credentials, select the Run As account you created for the alert connector.
- On the Server Details page, click Test Connection. If you receive “The connection to the server was successful.”, click OK, and then click Next.
- On the MP Selection page, click Select all, or select the management packs that define the configuration items you want to import, and then click Next.
- On the Schedule page, click Next, and then click Create.
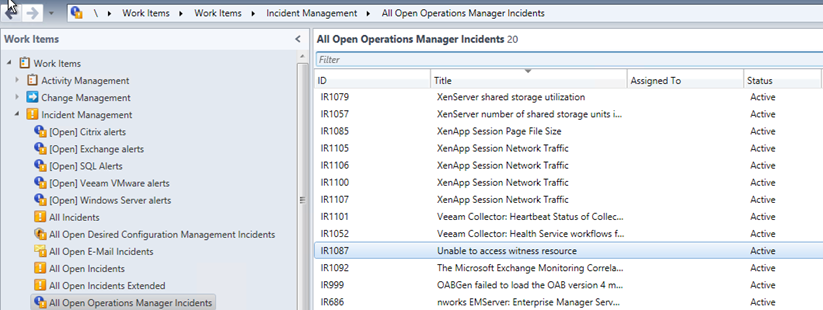
Now, you have created both the Alert connector and the CI connector that´s needed to start working with your alerts as incidents in Service Manager instead of the Operations console. If you have followed the above steps, you should now see something similar to the picture below:
Testing the connectors
Of course you want to try the connectors to make sure that updates can be transferred both from and back to SCOM. Open one of the incidents created in Service Manager and assign it to yourself, you will now be able to see an update on the alert in SCOM by clicking properties. See the picture below for an example:

Click OK to update the incident and then switch to the Operations Console.
Look for the alert in the console, perhaps in the “Active alerts” view and choose properties for the alert and you will see that it´s got some information from Service Manager.

As you can see, the alert has been updated with the information that I provided inside Service Manager. This way, the personnel will always know if someone is looking in to the problem or if its left unpicked.
The same thing will happen when an alerts gets resolved but the incident will be closed in Service Manager. This can of course be configured to gather verification but the default option is to close incidents when an alert is resolved.
Summary
The connection between the two systems isn´t really that hard to set up, it takes about half an hour for a basic set up, however if you want to make it more advanced, then it might take some more time. I will come back in a new post to show how different alerts can be routed to different support groups and bound to specific incident templates to make the most of the systems.
If you have any questions, just leave a comment on the post and I will get back to you as soon as possible.
Comments