
Installing OMS and Service Map Agents with PowerShell
Back in January this year I wrote a post about how you can install the OMS agent using PowerShell. Now the time has come to include the Service Map agent in the equation as well since this is a feature that recently got Generally Available. You can find the original post about installing the OMS agent here. What´s new in this script is that I have added a section for downloading and installing the Service Map agent as well. Enough talking, let´s get to it! Preparations
You will of course need the script, which you can download from my TechNet Gallery here. Download it and place is somewhere where you will find it the next time you want to use it. 😊
See the script below;
<# Author: Daniel Örneling Date: 20/6/2017 Script: InstallOMSAgentwithServiceMap.ps1 Version: 1.0 Twitter: @DanielOrneling #>
Set the Workspace ID and Primary Key for the Log Analytics workspace.
param( [parameter(Mandatory=$true, HelpMessage=”The ID of the Log Analytics workspace you want to connect the agent to.”)] [ValidateNotNullOrEmpty()] [string]$WorkSpaceID,
\[parameter(Mandatory=$true, HelpMessage="The primary key of the Log Analytics workspace you want to connect the agent to.")\]
\[ValidateNotNullOrEmpty()\]
\[string\]$WorkSpaceKey )
Set the parameters
$FileName = “MMASetup-AMD64.exe” $SMFileName = “InstallDependencyAgent-Windows.exe” $OMSFolder = ‘C:\Source’ $MMAFile = $OMSFolder + “\” + $FileName $SMFile = $OMSFolder + “\” + $SMFileName
Start logging the actions
Start-Transcript -Path C:\OMSAgentInstallLog.txt -NoClobber
Check if folder exists, if not, create it
if (Test-Path $OMSFolder){ Write-Host “The folder $OMSFolder already exists.” } else { Write-Host “The folder $OMSFolder does not exist, creating…” -NoNewline New-Item $OMSFolder -type Directory | Out-Null Write-Host “done!” -ForegroundColor Green }
Change the location to the specified folder
Set-Location $OMSFolder
Check if Microsoft Monitoring Agent file exists, if not, download it
if (Test-Path $FileName){ Write-Host “The file $FileName already exists.” } else { Write-Host “The file $FileName does not exist, downloading…” -NoNewline $URL = “http://download.microsoft.com/download/1/5/E/15E274B9-F9E2-42AE-86EC-AC988F7631A0/MMASetup-AMD64.exe” Invoke-WebRequest -Uri $URl -OutFile $MMAFile | Out-Null Write-Host “done!” -ForegroundColor Green }
Check if Service Map Agent exists, if not, download it
if (Test-Path $SMFileName){ Write-Host “The file $SMFileName already exists.” } else { Write-Host “The file $SMFileName does not exist, downloading…” -NoNewline $URL = “https://aka.ms/dependencyagentwindows” Invoke-WebRequest -Uri $URl -OutFile $SMFile | Out-Null Write-Host “done!” -ForegroundColor Green }
Install the Microsoft Monitoring Agent
Write-Host “Installing Microsoft Monitoring Agent..” -nonewline $ArgumentList = ‘/C:”setup.exe /qn ADD_OPINSIGHTS_WORKSPACE=1 ‘+ “OPINSIGHTS_WORKSPACE_ID=$WorkspaceID “ + “OPINSIGHTS_WORKSPACE_KEY=$WorkSpaceKey “ +’AcceptEndUserLicenseAgreement=1”’ Start-Process $FileName -ArgumentList $ArgumentList -ErrorAction Stop -Wait | Out-Null Write-Host “done!” -ForegroundColor Green
Install the Service Map Agent
Write-Host “Installing Service Map Agent..” -nonewline $ArgumentList = ‘/C:”InstallDependencyAgent-Windows.exe /S /AcceptEndUserLicenseAgreement:1”’ Start-Process $SMFileName -ArgumentList $ArgumentList -ErrorAction Stop -Wait | Out-Null Write-Host “done!” -ForegroundColor Green
Change the location to C: to remove the created folder
Set-Location -Path “C:\”
<#
Remove the folder with the agent files
if (-not (Test-Path $OMSFolder)) { Write-Host “The folder $OMSFolder does not exist.” } else { Write-Host “Removing the folder $OMSFolder …” -NoNewline Remove-Item $OMSFolder -Force -Recurse | Out-Null Write-Host “done!” -ForegroundColor Green } #>
Stop-Transcript
Alright, so the script is in place. Lets´s rock and roll!
Before you can run the script you´re going to need two things.
- Your Workspace ID
- Your Workspace Primary Key
Head over to the OMS portal and step into Settings -> Connected Sources -> Windows Servers. Copy the Workspace ID and the Primary Key as seen below.

Running the script You need to run the script as an administrator, and you will also need internet access from the server to download the files. However, if you don´t have internet access you could always download the agents somewhere else and copy it to the folder C:\Source and the agent would be installed by the script.
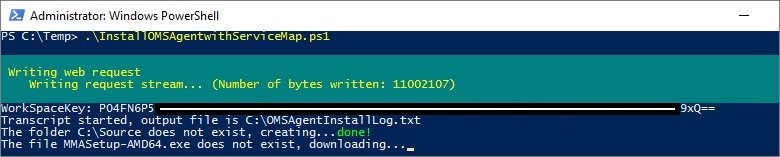
See below what it looks like running the script. You will be asked to put in the Workspace ID and the Workspace Key that you just looked up.

The agents are downloaded to the folder.
And you´re done installing the agents. You´re ready to go Service Mapping. 😊
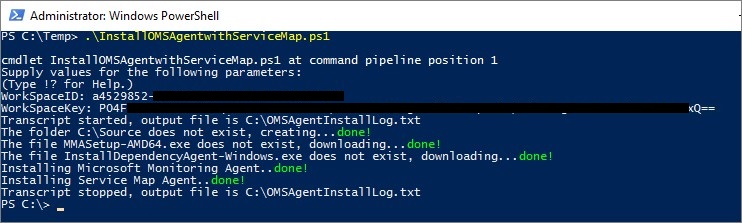
Just to show you what it looks like, the two agents are installed and good to go.

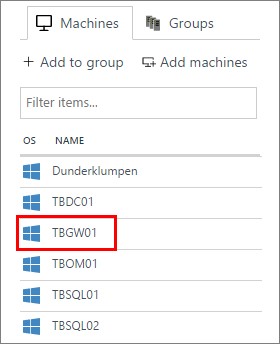
This query will show you all the Windows servers (and clients for that matter) that are communicating with Log Analytics. As you can see, the TBGW01 server are also communicating now that the agents are installed.
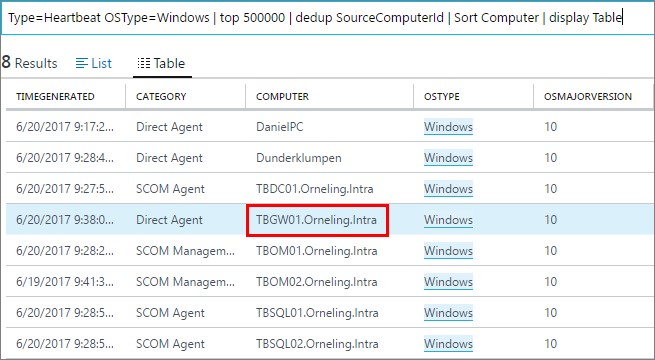 The query to use: Type=Heartbeat OSType=Windows | top 500000 | dedup SourceComputerId | Sort Computer | display Table
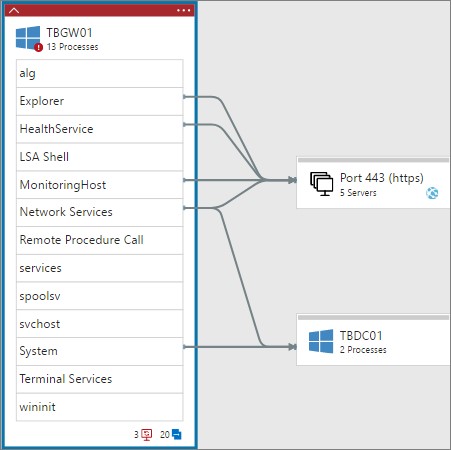
Looking at the Service Map solution in the OMS portal will show you something like below.
And then you will have your server assesses using the Service Map agent as you can see below.
Summary I hope this will help you out in installing OMS and Service Map agents in your environment. I have deactivated the section in the script that deletes the C:\Source folder when the installation is done. This is simply because you shouldn´t delete the folder if you have any other important files in there. Feel free to use the line if you want to, but you will need to activate it yourself by editing the script and removing the lines 83 and 94.
If you want to know more about Service Map, you can check out my previous posts, A first look at OMS Service Map and A deeper look at OMS Service Map.
If there are any questions, just leave a comment below and I´ll get back as soon as possible. Otherwise, have fun deploying agents in your environment 😊
Comments